Category: Digital Chaos Control

  • How to Organize Using Evernote Notebooks

    How to Organize Using Evernote Notebooks

    Evernote Notebooks

    Evernote Notebooks – the First Level of Organization


    If you’ve read my blog post on Evernote here: Use Evernote For a New Level of Organization then you know that it’s a great way to organize your digital information.

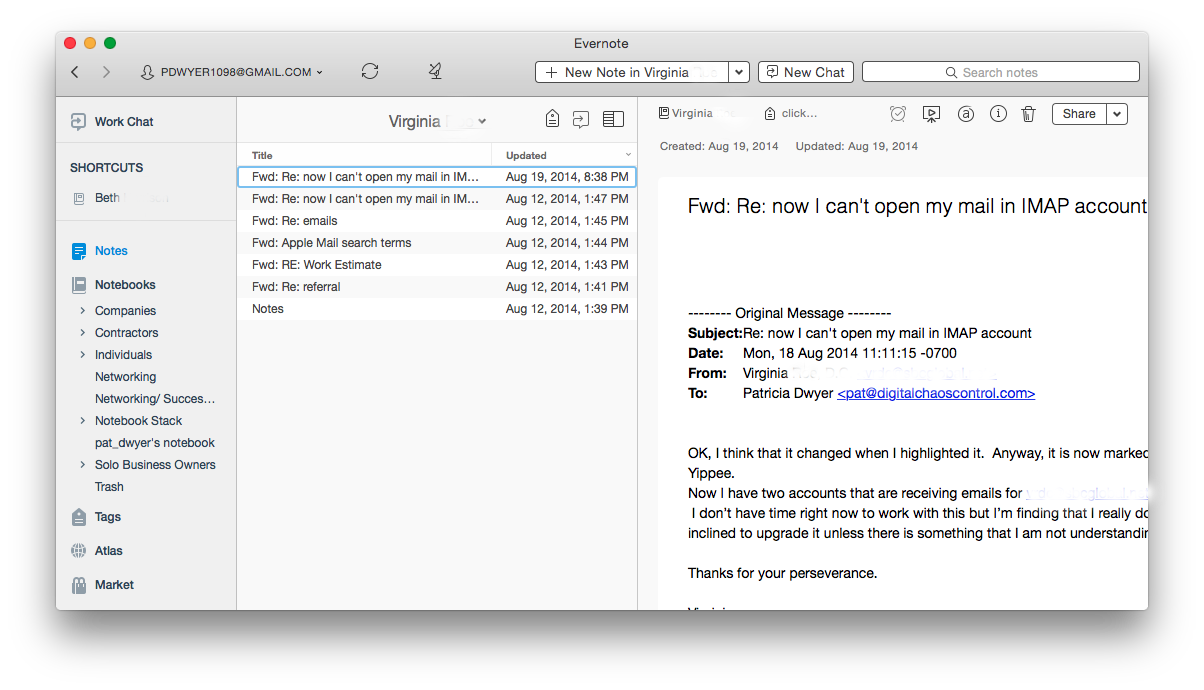
    Navigating the Evernote interface is dependent on the platform that you’re using it on. I have a desktop PC, a MacBook, and a smartphone – all of which are running Evernote. (You can also use Evernote through their web interface.) Since my main computer is a PC desktop, I typically do my Evernote notebook organization using the PC application. Then, with my organization in place, I can take notes, tag notes, add photos & web clippings – targeting a particular notebook no matter which platform I’m using.

    Notebooks can be “stacked”, meaning that you can create one level of hierarchy. You may have a “clients” stack for example, with a notebook for each client underneath, or a “research” stack, with a notebook for each area of research.

    Here’s how to create Evernote notebooks:

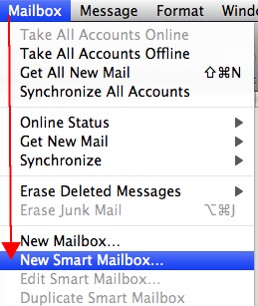
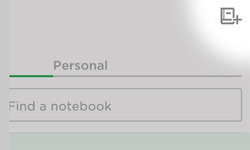
    Click on “Notebooks” in the sidebar. Click on “New Notebook” at the top (or on the below symbol if you’re using a smartphone app/web interface).

    Evernote New Notebook

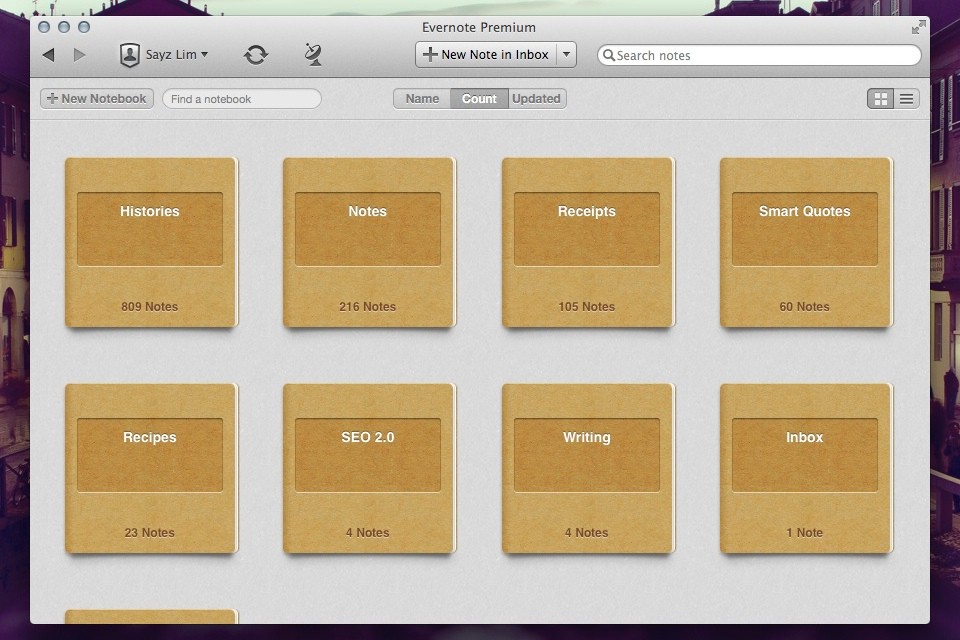
    Once you’ve added the notebook, it will show up under “Notebooks” in the sidebar in alphabetic order. Select that notebook so that any new notes will go into it.

    Here’s how to manage Evernote notebooks stacks:

    In the PC or Mac application, when you click and drag one notebook to another then Evernote will create a “Notebook stack”, which you can rename. Or you can right-click on a notebook for a list of options, including “Add to stack” or “Remove from stack”.

    In iOS:

    1. Navigate to your notebook list view.
    2. Tap Edit in the upper right screen.
    3. Select the information icon (“i”) next to the notebook you would like to move to your stack.
    4. Tap Stack.

    In Android:

    If you press and hold on a notebook name, you’ll get a menu with a list of options, including “Move to stack”.

    Keeping Evernote notebooks is like keeping stacks of file folders on your desk, except with no clutter! Use your notebooks to store notes, files, photos, web clippings, and emails so that everything is in one place making it easy to find what you need, when you need it.

    Need help with Evernote? Contact me.

  • Use Evernote For a New Level of Organization

    Use Evernote For a New Level of Organization

    Evernote

    Have you heard of Evernote?

    It’s hard to tell you what it is in one sentence. It’s a note-taking application, you can use it to create to-do lists, you can use it to organize files into notebooks, you can use it to scan documents and make them searchable, you can use it to “clip” and save web pages, etc. The list goes on and on…

    Whether you’re someone who likes to keep digital information organized or whether you’re someone that is organizationally challenged, then Evernote may be the tool for you. You can keep almost anything organized with Evernote – by keeping related items in one place.

    If you’re working with projects, you can use Evernote to organize, share, and collaborate on your projects. If your business involves working with clients, and you’d like a new way to manage those clients, you can use Evernote to keep your client information in one place and to write yourself memos, checklists, and reminders about that client.

    Here’s how to use Evernote for organization:

    1. For each new project or client, create a new notebook.
       
      A note of caution: Keep in mind that Evernote is a cloud application. Anything on the Internet is only as secure as your password, so be sure to use strong passwords and to update them regularly.
    2.  

    3. Share the notebook with collaborators and/or clients.
    4.  

    5. As you work with the project or client, update notes or add new notes. For documentation and or photos, add it to the note as an attachment.
       
      Depending on how you work, you may find that you’re looking at web pages and that you want to save them for reference. Don’t use bookmarks. Install the Evernote Web Clipper extension into your browser. This will allow you to “clip” the page, or an article on the page, and save it to your project or client notebook.
    6.  

    7. Email correspondence goes into the notebook. When you sign up for an Evernote Plus account, you get an associated email address (something like username.XXX@m.evernote.com). This means that you can CC: your Evernote account on your client email correspondence, or you can forward the email later.
       
      If you add “@<notebook name>” to the email subject line, then Evernote will even put the email into the specified notebook.
    8.  

    9. Use tags to help find things. When you tag a note, you can search for all notes with the same tag. For example: If you want to know how your clients found you, you could tag your client notes with a “referred by:<>” tag, and then you can search for all client that have the “referred by: website” tag.
       
      You don’t have to use search to find tags; Evernote conveniently lists all of your tags on the sidebar, so you can just click on it. Here’s a blog post with more information on using tags: Using Evernote the Right Way.

    Now you can have all of your project or client information – notes, files, photos, websites, emails in one place!

    Wait, it gets better – Evernote has great search and is continuing to improve it. You can search within your notes & emails and, if you are a Premium user, then you can search within documents.

    You can search on titles, keywords, or tags, of course, but Evernote supports more advanced search as well.

    • You can search by date – use the format “created:yyyymmdd” or “updated:yyyymmdd”. Even better, search for a date range: use the format “created:day-x” or “updated:day-x”.
    •  
      For example, if you want to search for all notes that you created about infant formula in the last month, enter the following in the search bar: “infant formula” created:day-30.
       

    • If you want to see the notes that you created using your smartphone, enter the following in the search bar: source:mobile.*.
    •  

    • If you want to see just the webpages that you’ve clipped using the Evernote Web Clipper, enter source:web.clip.
    •  

    • If you’re using the Evernote Macintosh app, you can use plain English for your search. For example “Notes about infant formula in the last month”.

    Evernote is just one tool for information organization, but it’s an increasingly popular one and it continues to evolve.

    Try it out and let me know how it works for you! Contact me

    Get the “Controlling the Chaos” Newsletter and receive a free PDF download
    “Drowning in Email – A Lifeline for Communications Overload”

    * indicates required


  • Are you a desktop piler or closet piler?

    Are you a desktop piler or closet piler?

    Pile of Files

    If you don’t keep your digital files organized, chances are you are not as productive and efficient as you could be.

    Are you a desktop piler?

    Then you may also be someone who automatically saves files to the desktop.  This means that you have icons all over the place. Your computer desktop is much less visible than your actual desk desktop, so it may not bother you at all, except when you need to find something.

    Are you a closet piler?

    You may save documents to the application’s default location (usually “Documents” on the Macintosh and “My Documents” on the PC). When you browse to that location on your computer, you will see a long list of documents.

    When you know what to search for, file organization is not really an issue. But you can’t always remember the name of the file that you need. A combination of search techniques and good organization is what serves us best. Use search when you know that right terms. Browsing can be faster if you have good organization.

    Start first with defining the best organization method for you.

    If you work with projects, you might want to start with top-level project folders. Use sub-folders for each type of document. An example for a house remodeling contractor would be a top-level folder named “221 Main St.”, with sub-folders for each sub-contractor. If you’re a consultant, you might want to start with top-level client folders.

    Your organization system might consist instead of document types. For example, you might have a top-level “Marketing” folder, with sub-folders for “Presentations”, “Flyers”, “Brochures”, “Blog Posts”., etc.

    The best organization system for you will depend on how you look for things. The important thing is to start with a system, use it consistently, and to adjust it as needed.

    Here’s a nice post from Seagate, the disk drive company, on file organization: Organizing Your Digital Files.

    Get the “Controlling the Chaos” Newsletter and receive a free PDF download
    “Drowning in Email – A Lifeline for Communications Overload”

    * indicates required


  • Inbox Zero Eliminates Overload – by Michael Neuendorff

    Inbox Zero Eliminates Overload – by Michael Neuendorff

    Inbox Overload

    Do you suffer from email overload?

    Terrible, isn’t it? Every time you open your Inbox the email just flows in like a waterfall.

    The challenges with managing email are myriad. Here are a few:

    • Feeling overwhelmed before even getting started
    • Losing track of an email and asking the sender to send the email again. (Now there are 2 copies in the Inbox!)
    • Difficulty prioritizing
    • Looking at, but not dealing with emails. This becomes an unproductive pattern.
    • Email seems more like a curse than a benefit

    Can you relate? I worked with many people over the years that suffer from email overload. It’s a key reason why they feel chronically disorganized and unable to focus on what really matters each day. The email just keeps coming.

    Here’s my true confession: I used to be that way.

    I would routinely let my Inbox balloon to about 2,500, then I’d start cleaning up email for a period, usually over a holiday break, and get back down to 50 or less. After a few years of this, I decided enough was enough and devised some strategies that would work for me.

    This was more than 2 years ago. Since then I’ve never had more than 100 emails in my Inbox. As I write this I have 19 emails in my Inbox. Here are my 6 rules I follow to manage email.

    1. Move everything non-essential out of your Inbox. What I mean is to have a separate email address for personal email, which includes email from your bank, insurance company, restaurants you like, etc. This puts only business-related email into your primary Inbox. Second-level business email should go into folders via Rules or into another Tab ala Gmail. I use the Gmail tabbed approach.
    2. Be militant about unsubscribing to email you don’t want from Senders you no longer care about. Too many people are lazy about unsubscribing thinking, “I might like the next email I get.” (Even though they really don’t.) If you see value, keep it. If you don’t, throw it out. Simple rule: You should read all the email you get.
    3. Block time out for email cleaning at least every other day. I make sure I have a few hours to mow through my Inbox every few days. I am not willing to let email pile up so I make it a priority.
    4. Don’t use your Inbox as a reminder system. People leave email in their Inbox to remind them to do things. Use a Task Manager like Asana instead. Use email as a communication tool. That’s all.
    5. As soon as you deal with an email, file it away. I file email like crazy all the time. As soon as I reply to someone, I file their email. After they reply, I file it again. Over and over, file, file, file. By the way, this requires that you have file folders for everything and everyone.
    6. Delete email constantly. If I’m not filing it, I’m deleting it. Just as with Rule #5, refuse to let email linger.

    If you’ll follow these 6 rules you’ll have a fighting chance at Inbox Zero.

    The reason you want to do this is because it will lift a huge weight off your shoulders and you’ll realize the true power of email as the powerfully efficient communication and moneymaking tool that it is.

    Once you’re there, vow to never go back to the way it was. Ever.

    If you’d like more tips about dealing with email, get these two books: Getting Things Done by David Allen, and The Ultimate Sales Machine by Chet Holmes. These books cover much more than email, but their tips on this topic were instrumental to my approach.

    Michael Neuendorff is an acclaimed Business Coach and Sales Trainer. Learn more about his business at http://www.buildandbalance.com.

  • I never finish anythin…

    I never finish anythin…

    Task List

    If you’re using your email inbox as a task list, you’re probably seeing it get out of control. Even if you’re flagging important emails and looking at your flagged email daily, are you feeling a little worn-down with how many emails you’re seeing? Seeing a long to-do list or a stack of actionable emails can leave you feeling like throwing in the towel.

    You know that you can’t give up. You need to get through them because they were important enough to flag in the first place. The root of the problem is that it takes too much of your attention and decision-making skills to look at each one and determine the action needed.

    Save your email as a task

    In my blog post here: How to Ingrate Email with Task Management I write about integrating your email with a task manager. If you save an email as an actual task, then you can re-write the title and add notes to help you to remember what it is that you have to do. Wouldn’t it be much easier to look at a list of actionable tasks then a list of emails with vague titles?

    You still may have a to-do list that’s long, but if you focus on your top 5 every day then you can whittle down your list over time. (If you list continues to grow because of too-full days, you may also want to look at delegating and outsourcing.)

    Every task is an action

    One great technique for a to-do list is to make every task an action. I.e., if you have an email from David titled: “Hey Robin, can we talk soon?” you need a task that’s more like: “Contact David and schedule a discussion”.

    Here’s a great article about organizing your to-do list by emotion: Sort Your To-do List By Emotion. If I take the previous example and change it to this: “Contact David and schedule a discussion (Great Sense of Accomplishment)”, I would feel more motivated to get it done.

    Get the “Controlling the Chaos” Newsletter and receive a free PDF download
    “Drowning in Email – A Lifeline for Communications Overload”

    * indicates required


  • Do You Swipe?

    Do You Swipe?

    If you have a smartphone, you probably do. Apple’s iOS first popularized the use of swipe gestures such as swiping between app screens. In later iOS updates, Apple added more swipe gestures, such as swiping down to see notifications. Now, smartphone applications are adding their own swipe gestures, which are similar to clicking on something in a computer application and then selecting an action. But swiping is so much simpler, isn’t it?

    When you think about all of the actions that you can take with an email – reply to it, forward it, delete it, archive it, move it, flag it, etc., have you ever wondered if there’s a more efficient way?

    Swipe Gestures for Apple Mail

    Apple, Microsoft, and lots of other application developers have been thinking about it too. Here’s what you can do now with Apple mail on your iOS 9 device:

    • You can swipe on an email from left to right and mark the email as “Unread”.iOs Mail Swipe
    • As you swipe slowly from right to left, you can select “Archive”, “Flag”, or “More…”. From “More..”, you can select “Reply All”, “Forward”, “Mark..”, “Notify Me…”, “Move Message”.
    • Swiping quickly from right to left will delete the message.

    If you don’t like these gestures, you can go to your Mail settings and change them.


    On your Macintosh, you can swipe left on an email to delete it, or swipe right to mark it as read.

    Other Applications are Going Further

    Some application developers are going further. Here are a couple of examples:

    Google Inbox Swipe

    • Outlook for iOS adds the ability to swipe to schedule an email. This is like a “snooze” feature for an email that you don’t have time to deal with right now.
    • In Google’s Inbox app, swiping right marks the email as “Done.” Swiping left will “snooze” it, similar to Outlook’s “swipe to schedule”. Swiping down or up will close the email.

    One of the biggest breakthroughs in technology was the mouse and the ability to move a cursor around the screen, click to select, and click to perform an action. In the mobile-centric 21st century, we are moving rapidly toward an all-touchscreen world. Knowing the swipe gestures and other kinds of gestures for your favorite applications will keep you working efficiently.

    Confused about how to swipe? Contact me.


  • How to Manage Emails and Tasks

    How to Manage Emails and Tasks

    Tasks

    If you’re like me, you spend a good part of the day in front of a computer. I have several to-do lists, consisting of project tasks, business tasks, and personal tasks. Throughout the day, I’m also getting phone calls and emails.

    The phone calls are easy because they’re immediate.

    I take notes during the call, bring up my calendar for scheduling, and then fill in my intake form with the information that I’ve written down. I can then transition to my task management tool, my project management tool, or my CRM (customer relationship management) tool. If I get the call when I’m away from the office, then I will do some of this on my mobile device and the rest when I get to my computer

    Some emails are easy.

    If I see any emails come in from a paying client or a potential client, I will deal with that email shortly. If those come in when I’m out of the office, I’ll respond on my mobile device.

    Other emails become to-dos on their own.

    There may be invitations to meetings or events or lunch. There may be clients out of the office currently and whose emails I need to follow up on later. There may be business partners sending information that I’d like to read when I have time.

    Every single one of those emails becomes a task in itself. But they’re not on my to-do list, and they’re not organized into my daily blocks of time that I allocate for certain tasks. There is a risk that, by using my email inbox as another task list, there are things that won’t get done.

    It may be fine for you to keep emails as tasks in your inbox. You could schedule some time every day to deal with those tasks. It’s a good idea in general to block out time every day to do email anyway – to categorize emails, archive, delete or flag. You can sort your inbox so that the flagged emails are at the top, and then spend that time dealing with them.

    It’s easy to get behind with these emails tasks.

    You may find yourself with a list of flagged emails that just keeps growing. They’re all important, but how do you find the time to get through them? Are they all equally important?

    It may be more efficient to integrate those emails instead with whatever task management system you’re using. See my blog post here about email/task integration: How to Integrate Email with Task Management.

    If you’re not using a task manager, then here’s some that you can check out:

    1. Outlook

    If you use Outlook for email and calendar, then it may make sense to use the built-in task manager as well. The downside to this is that you can’t quit your email program to focus on your task list. You may find that other task managers fit your needs better.

    1. Google Tasks

    If you use Gmail and Google Calendar, then Google Tasks may make sense for you. The interface is easy to use and it functions just fine as a straight-forward task manager.

    1. Apple Reminders

    Apple Reminders is another good, simple task manager, for use on Apple devices only. If you don’t need collaboration, then Apple Reminders should work for you.

    1. Wunderlist

    This is my choice for a task manager. I have Wunderlist installed on all of my devices so that I can sync and access my to-do list wherever I am. I can create multiple lists, sub-tasks, a “starred” list, a “today” list, and I can share lists.

    1. Evernote

    Evernote is more of an information organization system then a task manager. But many people like to use it for their to-do lists. You can create an Evernote Notebook for your to-dos and assign reminders for them.

    Email can be a distraction in your otherwise productive day. It can be stressful to see those emails tasks piling up. You’ll need a regular routine to stay on top of those email tasks, whether it’s dealing with them as them come in, flagging them for follow-up, or integrating with your task manager.

    Get the “Controlling the Chaos” Newsletter and receive a free PDF download
    “Drowning in Email – A Lifeline for Communications Overload”

    * indicates required


  • How to Integrate Email with Task Management

    How to Integrate Email with Task Management

    Staying on top of email chaos is not easy.

    Even after you’ve followed the steps to manage your email inbox (see my blog post here: 4 Steps to Becoming More Responsive ), you still need to “deal with” those emails that require a follow-up task. How do you make sure that you get those done, and that they don’t get lost in the daily shuffle?

    The easiest way is to have a daily routine to review and act on those emails. If you flag the most important emails, you can sort your inbox by flag. You can then review those emails daily and then delete them or archive them as you finish your follow-ups.

    However, a more efficient way is to merge your email with a task management system. Your emails will then become integrated with your daily to-do list.

    If you’re an Outlook user, then you can use the built-in Outlook task manager.

    Outlook Flag for TaskFlagging an email in Outlook actually assigns a follow-up task. If your email account is a POP account, this is pretty straightforward: open the email and select a flag for Today, Tomorrow, Next Week, etc.  If your email account is an IMAP account, you have only the option of a flag with no follow-up date. You’ll have to drag the email to Tasks (in your sidebar) and then assign a due date.

    If you use Mac mail, you can drag an email to your Reminders list.

    Apple Reminders

    Click on the “i” at the right of the reminder, and then choose the day that you want to be reminded on.

    If you’re a Gmail user, you can create a Google reminder from an email.

    Gmail Add to TaskOpen the email, click on “More”, and then select “Add to Tasks”. Your Tasks window will open in the bottom right-hand corner. You can then click on the arrow next to your new task to give it a due date. (If you use the Google Inbox app on your mobile device, then see my blog post here: How to Manage Your Gmail Inbox).

    You can also integrate your email with dedicated task managers such as Wunderlist.

    Here’s how it works with Wunderlist: when you’re running the app on your device and signed into your Wunderlist account, you can send emails to your Wunderlist Inbox by forwarding to me@wunderlist.com. Once the email is in your Wunderlist Inbox, you can give it a due date.

    If you’re keeping your to-do list in Evernote, then I suggest creating an Evernote Notebook.

    You could call it “My Tasks”, and then you can then forward emails into that notebook. (You find your Evernote email address by going to “Account Info”.) When you forward an email to your Evernote email address, you can specify a notebook by adding “@<notebook name>” to the subject line. For example, if you forward an email titled “Request for more information”, you would add your “My Tasks” notebook name to that title, so: “Request for more information @My Tasks”. If you’d like to tag the email, also add “#<tag>” to the subject line. You can then go to your Evernote app and assign a due date.

    Many of us like to use our email inbox as a todo list. It’s possible to do this, particularly by using flags to prioritize, but it’s more efficient to have all of your to-dos in one place, including emails that you need to follow up on.

    SUBSCRIBE TO MY NEWSLETTER

    Get the “Controlling the Chaos” Newsletter and receive a free PDF download
    “Drowning in Email – A Lifeline for Communications Overload”

    * indicates required


  • How to Use Email Flagging to Prioritize

    How to Use Email Flagging to Prioritize

    If you’ve gone through the process of email organization (see my blog post here: 4 Steps to Becoming More Responsive), then you should have a streamlined inbox with just the most important emails. You also should have a daily routine of dealing with those emails that consists of:

    1. Evaluating and Categorizing
    2. Acting On, Filing, or Flagging by Priority

    Flagging an email in Outlook actually assigns a follow-up task.

    Outlook email flaggingIf your email account is a POP account, this is pretty straightforward: open the email and select a flag for Today, Tomorrow, Next Week, etc.  If your email account is an IMAP account, you have only the option of a flag with no follow-up date. You can then sort your inbox by selecting “Arrange By: Flag”. (You can also look at these flagged emails in your task list.)

    Gmail uses a star system to flag emails.

    If you go to your Settings in Gmail, you can see which color stars you have to choose from. To assign a colored start to an email, keep clicking on the star icon next to the mail until you have the color that you want. You will have to remember what each means in terms of priority; red is typically used for highest-priority emails, then yellow, then whatever color you like. Your starred emails are groups by color under “Starred”.

    Gmail Stars

    Apple mail uses color-coded flags.Apple Mail Flagging

    You can flag an email by selecting it and then selecting a color flag from the top menu. Flagging an email in Apple mail actually puts it in a separate Mailbox under “Flagged” (as well as leaving it in your Inbox.) You can rename that Mailbox to whatever you want to help you to remember what your priorities are. For example, you can rename the “Red” Mailbox to “High Priority”, the “Yellow” Mailbox to “Follow Up This Week”, etc.

    Do you need help managing email? Contact me.

  • How to De-Clutter Your Email Inbox

    If you’re like most people, you’re getting too many emails in your inbox.

    An overflowing inbox can create stress and cause you worry that you’re missing important emails.

    One way to reduce the number of emails going into your inbox is to unsubscribe to as many automatic emails as possible, such as the ones from shopping sites that add you to their newsletter or promotions list. However, there still may be automatic emails that you would like to receive and read when you have time. Those emails can be filtered so that they’re being saved automatically to folders that you’ve created but not cluttering up your inbox.

    Filters are automatic programs that run within your email reader.

    As your email arrives, the filters search for specific criteria, defined by you, and then perform a defined action based on those criteria. For example, your filter can search the “from” field for your grocery store name and then save the email to a folder that you’ve created.

    I suggest creating filters for:

    • Your social media notifications
    • Any mail lists that you’re a member of (school, church, community organization, etc.)
    • Any newsletters that you’re subscribed to.

    Apple SmartMailboxIf you use Apple Mail, you create the filters using “Rules” under “Preferences” or using the “Smart Mailbox” feature.

    A Smart Mailbox is a filter/mailbox combination (Apple calls folders “mailboxes”). However, a Smart Mailbox doesn’t move the original emails out of the Inbox, so it’s more like a saved search.

    Apple Mail also has a useful “VIP” feature that creates Smart Mailboxes for your favorite people. To create a VIP when you open an email from a favorite person, click on the star next to the “from” line in that email.


    If you use Outlook, filters are called “Rules.”Outlook Inbox Rules


    Gmail Inbox FIlter


    In Gmail, open the email that you’d like to filter, click on “More”, and select “Filter Messages Like These” from the drop-down list.

    You can also create an email filter from the search box. Click on the down arrow at the right end of the search box, enter your filtering criteria, and then click on “Create filter with this search”.

    Need some help with your email management? Contact me.