Category: Cloud Services

  • How to Get More Organized With Writing

    How to Get More Organized With Writing

    Evernote for Writing
    Screenshot courtesy of www.Evernote.com

    If you’re a writer, whether it’s creative or business, you know that the bulk of a writing task is doing research and/or making notes. When you sit down to compile that research and start your writing, it helps to have those notes, web clippings, photos, etc. organized.

    Having a good organization system for your writing can help so much with getting inspired, getting started, and saving time.

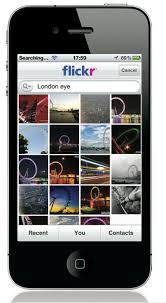
    I suggest using Evernote for this. (You can read my blog post on Evernote here: Use Evernote For a New Level of Organization).

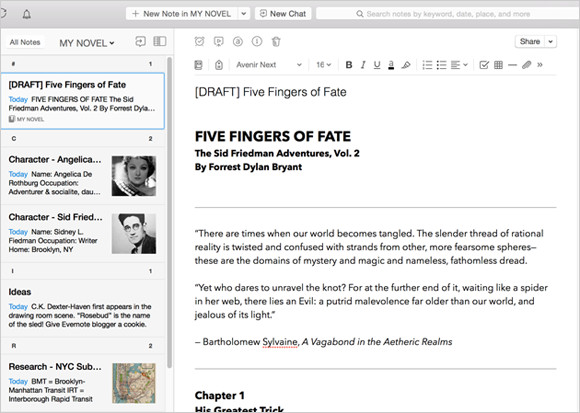
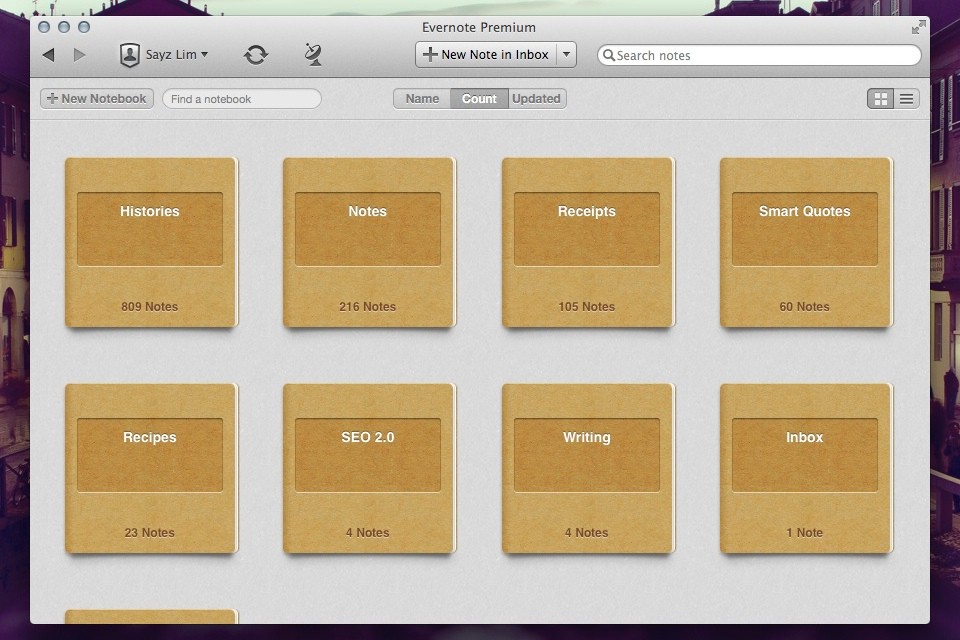
    There are multiple ways to use Evernote to organize your research. You can start with a notebook for “Research” with tags for each type of research. This is helpful if you won’t know the structure of your writing ahead of time. If you do have some structure in mind, it may be more helpful for you to have notebook stacks. For example, you could have a stack for each chapter, or a stack for each article.

    Use the Evernote app on your computer and mobile devices to write up your notes. You can add web clippings using the Evernote “Web Clipper” add-on in your internet browser and use the Evernote app on your smartphone or tablet to take photos.

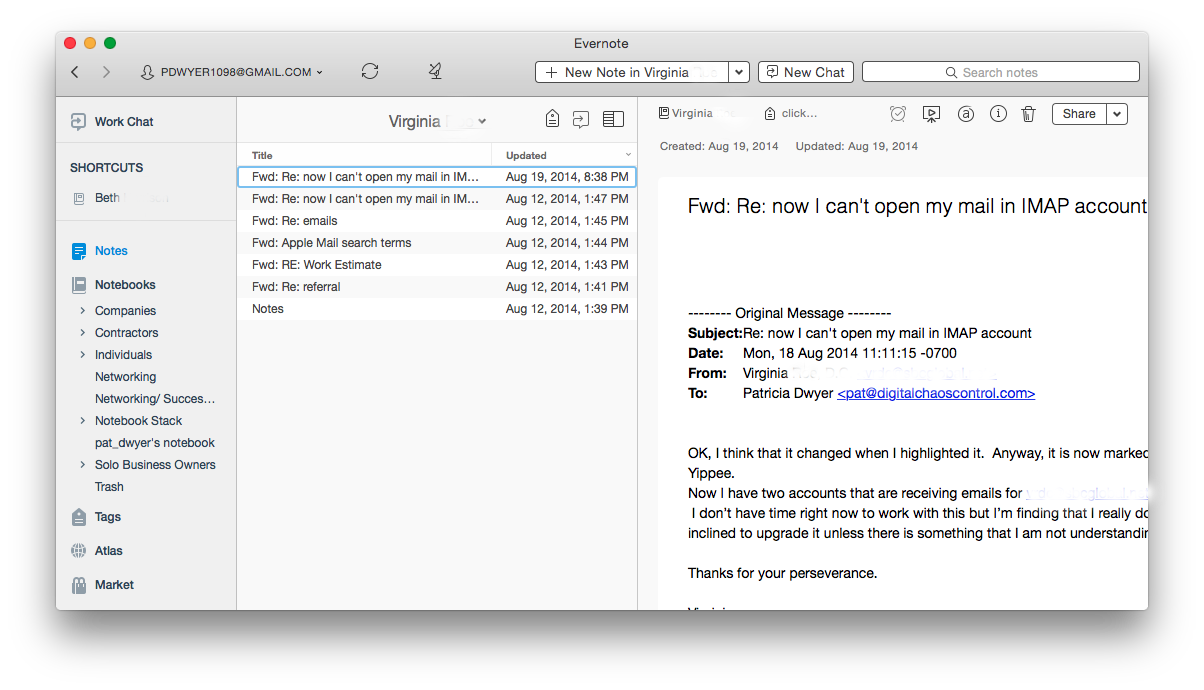
    Tags can be very helpful to search for all of your research on a particular subject.

    You can assign multiple tags to each note, web clipping, or photo. For example, if you’re writing a piece about wellness and you find a web site dedicated to healthy eating, you can clip it and tag it “wellness”, “eating”, “diet”, etc.

    Using Evernote for research gives you a tool to keep all of your research in one place. Evernote’s great search tool can help you to bring up references quickly so that the most tedious part of writing goes quickly and smoothly, leaving you more time for creativity and even more research!

    Are you a fiction writer? Here’s a great article on Lifehacker: How to Use Evernote for Writing Fiction.

    Need help with Evernote? Contact me.

  • How to Organize Using Evernote Notebooks

    How to Organize Using Evernote Notebooks

    Evernote Notebooks

    Evernote Notebooks – the First Level of Organization


    If you’ve read my blog post on Evernote here: Use Evernote For a New Level of Organization then you know that it’s a great way to organize your digital information.

    Navigating the Evernote interface is dependent on the platform that you’re using it on. I have a desktop PC, a MacBook, and a smartphone – all of which are running Evernote. (You can also use Evernote through their web interface.) Since my main computer is a PC desktop, I typically do my Evernote notebook organization using the PC application. Then, with my organization in place, I can take notes, tag notes, add photos & web clippings – targeting a particular notebook no matter which platform I’m using.

    Notebooks can be “stacked”, meaning that you can create one level of hierarchy. You may have a “clients” stack for example, with a notebook for each client underneath, or a “research” stack, with a notebook for each area of research.

    Here’s how to create Evernote notebooks:

    Click on “Notebooks” in the sidebar. Click on “New Notebook” at the top (or on the below symbol if you’re using a smartphone app/web interface).

    Evernote New Notebook

    Once you’ve added the notebook, it will show up under “Notebooks” in the sidebar in alphabetic order. Select that notebook so that any new notes will go into it.

    Here’s how to manage Evernote notebooks stacks:

    In the PC or Mac application, when you click and drag one notebook to another then Evernote will create a “Notebook stack”, which you can rename. Or you can right-click on a notebook for a list of options, including “Add to stack” or “Remove from stack”.

    In iOS:

    1. Navigate to your notebook list view.
    2. Tap Edit in the upper right screen.
    3. Select the information icon (“i”) next to the notebook you would like to move to your stack.
    4. Tap Stack.

    In Android:

    If you press and hold on a notebook name, you’ll get a menu with a list of options, including “Move to stack”.

    Keeping Evernote notebooks is like keeping stacks of file folders on your desk, except with no clutter! Use your notebooks to store notes, files, photos, web clippings, and emails so that everything is in one place making it easy to find what you need, when you need it.

    Need help with Evernote? Contact me.

  • Use Evernote For a New Level of Organization

    Use Evernote For a New Level of Organization

    Evernote

    Have you heard of Evernote?

    It’s hard to tell you what it is in one sentence. It’s a note-taking application, you can use it to create to-do lists, you can use it to organize files into notebooks, you can use it to scan documents and make them searchable, you can use it to “clip” and save web pages, etc. The list goes on and on…

    Whether you’re someone who likes to keep digital information organized or whether you’re someone that is organizationally challenged, then Evernote may be the tool for you. You can keep almost anything organized with Evernote – by keeping related items in one place.

    If you’re working with projects, you can use Evernote to organize, share, and collaborate on your projects. If your business involves working with clients, and you’d like a new way to manage those clients, you can use Evernote to keep your client information in one place and to write yourself memos, checklists, and reminders about that client.

    Here’s how to use Evernote for organization:

    1. For each new project or client, create a new notebook.
       
      A note of caution: Keep in mind that Evernote is a cloud application. Anything on the Internet is only as secure as your password, so be sure to use strong passwords and to update them regularly.
    2.  

    3. Share the notebook with collaborators and/or clients.
    4.  

    5. As you work with the project or client, update notes or add new notes. For documentation and or photos, add it to the note as an attachment.
       
      Depending on how you work, you may find that you’re looking at web pages and that you want to save them for reference. Don’t use bookmarks. Install the Evernote Web Clipper extension into your browser. This will allow you to “clip” the page, or an article on the page, and save it to your project or client notebook.
    6.  

    7. Email correspondence goes into the notebook. When you sign up for an Evernote Plus account, you get an associated email address (something like username.XXX@m.evernote.com). This means that you can CC: your Evernote account on your client email correspondence, or you can forward the email later.
       
      If you add “@<notebook name>” to the email subject line, then Evernote will even put the email into the specified notebook.
    8.  

    9. Use tags to help find things. When you tag a note, you can search for all notes with the same tag. For example: If you want to know how your clients found you, you could tag your client notes with a “referred by:<>” tag, and then you can search for all client that have the “referred by: website” tag.
       
      You don’t have to use search to find tags; Evernote conveniently lists all of your tags on the sidebar, so you can just click on it. Here’s a blog post with more information on using tags: Using Evernote the Right Way.

    Now you can have all of your project or client information – notes, files, photos, websites, emails in one place!

    Wait, it gets better – Evernote has great search and is continuing to improve it. You can search within your notes & emails and, if you are a Premium user, then you can search within documents.

    You can search on titles, keywords, or tags, of course, but Evernote supports more advanced search as well.

    • You can search by date – use the format “created:yyyymmdd” or “updated:yyyymmdd”. Even better, search for a date range: use the format “created:day-x” or “updated:day-x”.
    •  
      For example, if you want to search for all notes that you created about infant formula in the last month, enter the following in the search bar: “infant formula” created:day-30.
       

    • If you want to see the notes that you created using your smartphone, enter the following in the search bar: source:mobile.*.
    •  

    • If you want to see just the webpages that you’ve clipped using the Evernote Web Clipper, enter source:web.clip.
    •  

    • If you’re using the Evernote Macintosh app, you can use plain English for your search. For example “Notes about infant formula in the last month”.

    Evernote is just one tool for information organization, but it’s an increasingly popular one and it continues to evolve.

    Try it out and let me know how it works for you! Contact me

    Get the “Controlling the Chaos” Newsletter and receive a free PDF download
    “Drowning in Email – A Lifeline for Communications Overload”

    * indicates required


  • 6 Steps for a Photo Organization Routine

    You may or may not remember film photography – keeping exposed film in your fridge, dropping it off for developing, getting prints that you eagerly look through, picking out your favorites, and putting them in a photo album.

    Now we have an abundance of digital photographs, and most of us are not taking the time to look through them and organize them, which means that when you want to go back and find those special photos, you might find yourself in a time-consuming and frustrating search.

    Getting an organization system in place is something that you should start now for your future photos, and that you can implement for your past photos as you have time.

    Most photo management programs organize your photos by date. When you need to find a particular photo, this system works fine as long as you remember the event or date that you took that photo. A better system would be to go back to that old-fashioned concept of photo albums: create events, tag people, and add categories.

    Here are the steps to follow for a photo organization routine:

    1. Import using your photo management software. Your newly imported photos will be organized by date.
    2. If it doesn’t already exist,create a new album or folder for this year
    3. Under this year, create a new album or folder for the current quarter (ex: Q1, Q2, etc.)
    4. Under this quarter, create a new album or folder for each event.
    5. Move the newly imported photos to the relevant event or to the current quarter if there’s no associated event.
    6. Select the photos for that event and add tags or keywords describing the event, date, people, etc. (Depending on the photo management software you use, this is calling “tagging” or “assigning keywords”).


    Windows Photo Gallery
    Windows Photo Gallery: Adding Tags
    Apple Photos
    Photos: Assigning Keywords

    Organizing your photos by date and event allows you to easily browse through and find photos, and assigning keywords or tags allows you to easily search or sort by keyword.


    Did you find this post useful? The way that we work with information is changing and you can help spread the word by sharing with your social media.

    Do you have questions? Share them by commenting below or contact Patricia at 650.517.3142 or pat@digitalchaoscontrol.com for a complimentary consultation.

  • What You Need to Know About the New Apple Photos

    What You Need to Know About the New Apple Photos

    Did you know that Apple has replaced their both their iPhoto and Aperture applications with a single new application called just “Photos”?

    Apple released Photos with the latest Mac OS X Yosemite update (OS X 10.10.3). To upgrade, just go to Software Update on your Mac and choose the OS update. Once the update is installed, then Photos will automatically import your iPhoto or Aperture library.

    Photos works a lot like your iOS 8 iPad or iPhone photo app. You’ll see your photos organized into thumbnails by date, you can save photos into photo albums, and you can share on sites like Twitter, Facebook, and Flickr.

    iCloud Photo LibraryThe update includes support for iCloud Photo Library. If you enable this option in Preferences, then all of your photos (it’s all or none) will be stored in iCloud and synced to any of your devices that have the option enabled under iCloud settings. That means that you can access your entire photo library on your mobile devices, and that any photo edits get synced as well. And the good news is that your mobile device will store only the thumbnail, not the full photo unless you choose to download it.

    “But I’ve always had my photos in the iCloud”, you say? Well, no you haven’t. If you had Photos enabled in your iCloud settings, then your photos were going to Apple’s Photostream, which is not the iCloud.

    Photostream is a mechanism for syncing your photos to your Mac over the Internet. Your photos were stored in Photostream for only 30 days (or the last 1000 photos). Photostream didn’t count toward your iCloud storage space, but iCloud Photo Library does. So if you plan on taking advantage of iCloud Photo Library, you’ll need to look at how much space your photos take up, and upgrade your iCloud plan accordingly.

    FlickrAn alternative to iCloud Photo Library is Flickr. Flickr is not a cloud sync system, so photos saved to Flickr are copies in the cloud. If you delete a photo in your iCloud Photo Library on your iPhone, for example, then the photo will be deleted everywhere – in the cloud, on your Mac, etc. But since photos on Flickr are copies, they will be stored on Flickr until they’re deleted from Flickr. Flickr offers a whopping 1TB of free photo storage, and it has both iOS and Android apps.


    Did you find this post useful? The way that we work with information is changing and you can help spread the word by sharing with your social media. Do you have questions? Share them by commenting below or contact Patricia at pat@digitalchaoscontrol.com for a complimentary consultation.

  • Are You Tired of Your Old Computer? Why Not Go PC-free?

    Are You Tired of Your Old Computer? Why Not Go PC-free?

    PC-FreeHave you ever wondered if you still need a computer? If you own both a smartphone and a tablet and find yourself using your computer less and less often, then it’s a valid question. Our mobile devices have evolved to become as powerful as some desktop computers. They are easier to use in many ways with their touch interfaces and dedicated apps and also easier to maintain. They are less vulnerable to hackers (thus far).

    So when the time inevitably comes that your computer has died or has gotten too old to be useful, why get a new one? Why not go PC-free?

    If you still use your computer to create a lot of content, then it’s probably not the right time to go free. Although you can have a keyboard for your mobile device and create content quite well using apps like Kingston Office or on-line tools like Google Docs, computers still shine with their full-featured content creation tools. Also, if you’re running a business or doing your own taxes, you will need a computer for the foreseeable future.

    The other main difference between a computer and a mobile device is the amount of storage for your content. You have hundreds of even thousands of gigabytes available to you on your computer, which allows you to store all of your photos, videos, & documents, back them up, and have instant access to them. Your mobile device on the other hand has only a few gigabytes of storage and can fill up very quickly if you use it for photos and videos. You should already have a plan to backup and archive your content, but going PC-free means makes it critical to do so.

    You can use external storage like SanDisk’s Connect Wireless Drive to add additional storage for your mobile device. You can also use cloud services like iCloud, Dropbox, SugarSync, Google Drive, Flickr (for photos), Google Music (for music), and iTunes Match (for music). I always suggest using both external storage and cloud storage as you want, ideally, three copies of your content.

    You will probably replace your mobile device a lot more often than you replace your computer. We’re all subject to losing or breaking these devices, so be sure that your content can be easily restored to your new device.

    Go PC-free and you’ll be on the cutting edge. We may all see the end of personal computers someday soon.


  • How Do I Know if my Cloud Storage is Secure?

    How Do I Know if my Cloud Storage is Secure?

    cloud storageI am a big fan of cloud storage services. It’s magic to me, the way that the photos that I take with my cell phone appear on my PC when I get home, without having to plug anything in. And to have all of my work from my desktop PC available to me on my laptop.

    My data is available to me alone unless I choose to share it with someone. Most cloud services encrypt the data during transfer to/from the Internet (“SSL” encryption – you’ll know it’s encrypted because of the “s” in “https”), and then again when it’s stored on their servers. So if a hacker gets into their servers, unless they can crack the encryption, my data is still private.

    The main risk is if my password gets compromised. Then anyone with my user id and password could access all of my data. If you’re concerned about cloud security, then it’s important to have a strong password, and to change it often.

    strong passwordYou’ve probably heard that term before, but what does “strong” password mean? How long does it need to be? Do you need special characters? Numbers? How many? Do you need a different password for every cloud service? How do you remember all of those passwords?

    It’s a complex subject. And unfortunately, the recommendations for “strong” passwords keep changing, as the hackers become more sophisticated.

    I recommend using a password manager. Let the experts worry about it. A password manager is a plug-in for your web browser. You can use it to generate a password and it will indicate how “strong” that password is. Once you use that password to log into your cloud service through your web browser, then you can store that password in your “password vault” that the plug-in supplies.

    The password manager is itself a cloud service, so you need a password for it. But it’s the only password that you really need to remember for all of your cloud services. I start with a word that has some personal meaning to me, add a character between syllables, a few numbers at the end (that I’m sure that I’ll remember), and then use the word in a complete phrase.

    Password managers use a extra level of security for their cloud service. Your password vault gets encrypted locally, on your own computer, and then transferred and stored on the cloud server. When you log into the service through your web browser plugin, the reverse process happens – the password vault is transferred from the cloud down to your PC, and then decrypted.

    LastPass Logo

    I use LastPass as my password manager. Other people that I know have recommended OnePassword, which works similarly.

    I believe that you can relax about your cloud security if you use a password manager and if you change your passwords regularly. The convenience of using a cloud service far surpassing the slight risk of having your privacy compromised. However I do not use cloud services for financial data, nor do I store my passwords for financial sites in my password manager. I suspect that it would be fine to do so, but I’m just not quite willing to risk it…

    If you need help setting up your cloud service or password manager, Digital Chaos Control can help! Contact us today.

  • How to Stream Music That You’ve Ripped to Your Mobile Device

    How to Stream Music That You’ve Ripped to Your Mobile Device

    Stream music from your library

    If you have a collection of CDs that you’ve ripped into digital form, then you’re probably enjoying the music on your PC. But do you know how to also stream music that you’ve ripped on your smartphone or MP3 player?

    You may be using Windows Media Player or iTunes to manually sync some playlists to your portable device. There is a way to stream music from your entire library anywhere that you are, as long as you’re connected to a wireless network.

    iTunes Match and Google Music are cloud storage services that allow you to stream music. (I’ve summarized these services below.)

    After you sign up for a service and install the application on your PC, you start by “matching” your music library with the available tracks offered by the service. The application will upload only the tracks that don’t match to the cloud storage.

    The next step is to install the mobile app on your device and log into the service. Now you’ll be able to “stream” music from your entire library to your device!

    Here are some details on the services:

    iTunes MatchiTunes Match: $25/year; no storage limit; up to 100,000 songs can be matched


    Google Music, music streamingGoogle Music: free; 50,000 song maximum


    If you need help managing your music library, Digital Chaos Control can help!

    Contact Me

  • Photo Sharing

    Camera
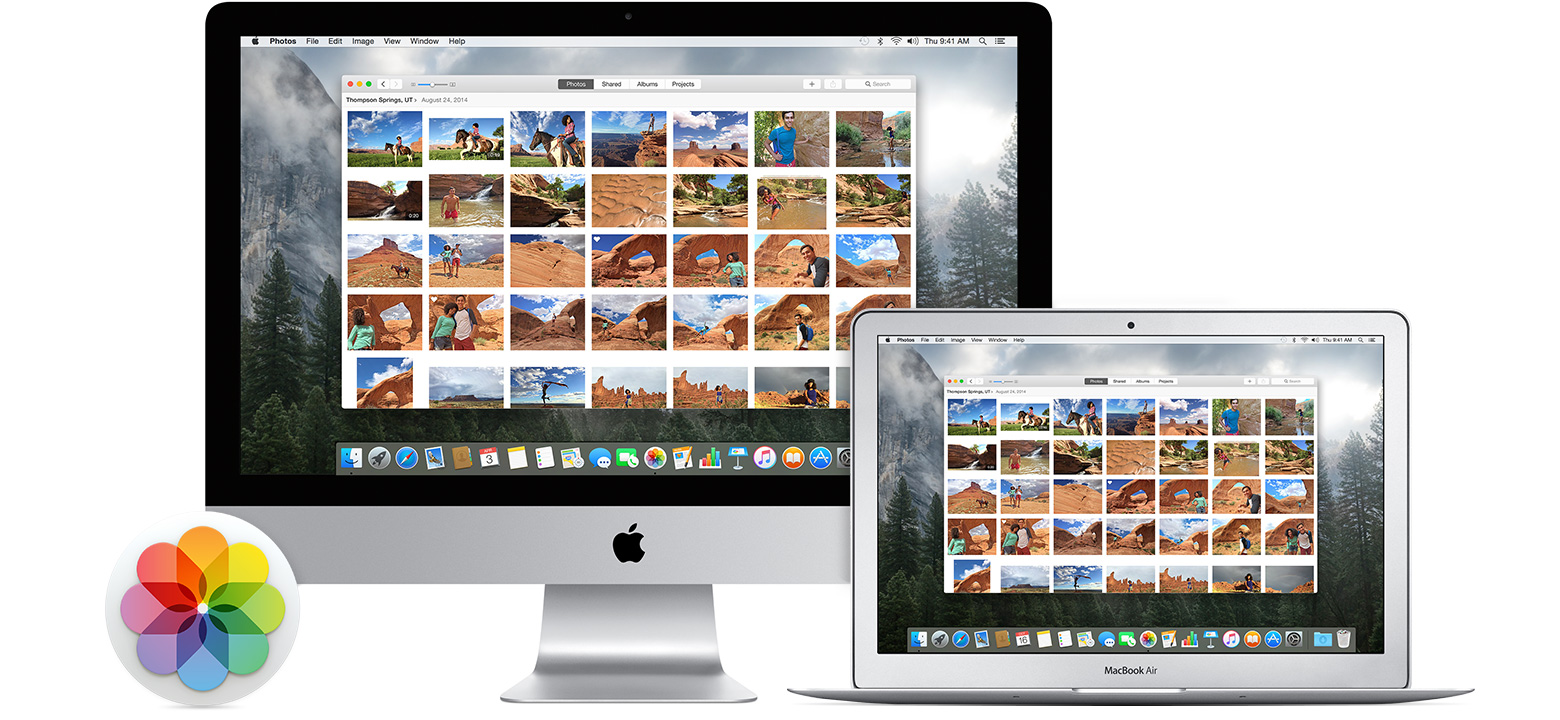
In this age of digital photography, we generate tons of photos – our families, pets, vacations, school field trips, concerts, parties; the list goes on and on. The old days of getting our photos printed and into binders and scrapbooks are largely gone. It used to be fun to pull out the old photo albums and sit down with family and friends to laugh at crazy poses and faces, and to experience a shared emotion and memory of those who have passed on.

    We still have our photo albums, but they’re on our computers. And fortunately, there’s lot of ways to share our digital photo albums.

    The closest things that we have to our old binders that we can sit down and share are our portable devices – our smart phones, tablets, and laptops. It is possible to duplicate your entire photo library on a portable device if you have enough storage, but for most of us, there are just too many photos to fit. We have to manage our photo albums on our devices.

    When I travel to visit family, I go through my computer photo albums, and I pick which albums I want to bring with me. The next step to to sync those albums with my device. There are several ways to do this:

    1. Copy files – You can copy the files from the albums that you choose to your devices through USB, or to a memory card or flash drive that you move to the portable device. This is an easy option if you’re comfortable with computers and peripheral devices.

    2. USB Sync – You can use software to sync specific albums to your device. If you connect your iPhone or ipad, for example, through USB, you can use iTunes to select and sync albums. This is a great option if you use Apple devices and you’re familiar with iTunes.

    3. Cloud Sync – You can use a cloud sync service such as Dropbox or Sugar Sync to select and sync specific photo albums. These cloud services are very easy to use. You’ll have to have the software installed on both your computer and your portable device.

    4. Cloud Photo Sharing – You can use a cloud photo sharing service such as Flickr or Shutterfly to upload and share specific photo albums. Once you’ve created an account on Flickr, you can connect with it through iPhoto or Windows Live Photo Gallery and easily upload photos. You can install a Flickr app on your portable device and you’ll be able to view your albums and display slide shows whenever you have internet connectivity. You can also share the link with friends and family.

    5. Social Networks – You can use a social network such as Facebook or Google+ to upload and share specific photo albums. Your photos on Facebook won’t be full resolution, but this is a great option to show photos if you’re comfortable with Facebook and want to share only with your Facebook friends. You can also tag people in your photos.

    If you need help organizing and tagging photos, syncing with your devices, and/or setting up cloud services, Digital Chaos Control can help! Contact us today.

  • Do You Need a Cloud Service?

    Do You Need a Cloud Service?

    Cloud Storage

    You may have heard of “The Cloud”. It’s a term that basically just means Internet storage.

    Your email, for example, is a cloud service. Your email is stored on an email server, and delivered to your device(s) over the Internet. If your PC dies, or you lose your laptop, your email goes on accumulating on the server, and you can download all of the new email as well as all of the previous email, when you get back on-line.

    So that’s pretty convenient, right? Why not offer a service that does that for all of your documents, and your photos too? That way you get backup and easy retrieval when you need it. Hey, maybe you can even sync all of that data on your desktop, your laptop, and your iPad too. Wouldn’t that be cool?

    Happily, there are many cloud back-up services available that will do just that. They will automatically backup your designated data and sync that data with your other devices.

    So which cloud service to use?

    The first step in choosing a cloud service is to determine is how much storage you need. If you only want to store your important documents then a free service will be fine for you, but if you have tons of music files that you ripped from your CDs and also thousands of digital photos, then you may need a good deal of storage.

    You also want a service with the right features for you. For example, you may want to put everything in one designated folder and have it automatically backed up, or you may want a service that can sync your existing folder structure. And the software needs to be compatible with all of your devices.

    Here’s a summary of some of the cloud services. All of these services support Mac, PC, and iOS, and all except iCloud support Android.


    iCloudiCloud:

    Storage: 5GB free; $9.99/month for 1TB

    Features: automatic backup of iPhone and iPad; automatic sync of calendars, notes, and contacts; automatic sync of all content stored on iCloud Drive; automatic sync of all photos stored in iCloud Photo Library


    Google Drive Cloud StorageGoogle Drive:

    Storage: 15GB free; $9.99/month for 1TB

    Features: Automatic sync of all content stored on Google Drive; automatic upload for mobile photos


    Microsoft OneDrive Cloud StorageMicrosoft OneDrive:

    Storage: 5GB free, $1.99/month for 50GB; $6.99/month for 1TB of personal storage when subscribing to Office 365

    Features: Automatic sync of all content stored on OneDrive; automatic upload for mobile photos


    Dropbox Cloud StorageDropbox:

    Storage: 2GB free; $9.99/month for 1TB

    Features: Automatic sync of all content stored in the Dropbox folder; automatic upload for mobile photos


    SugarSync Cloud StorageSugarSync:

    Storage: 5GB free; $9.99/month for 250GB

    Features: Automatic sync of all content in designated folders; automatic upload for mobile photos


    There are also dedicated services for music and photos if you don’t want to pay for an all-in-one service. I’ll be writing about those services in an upcoming post, so check back soon!

    Need help with cloud services? Contact me.